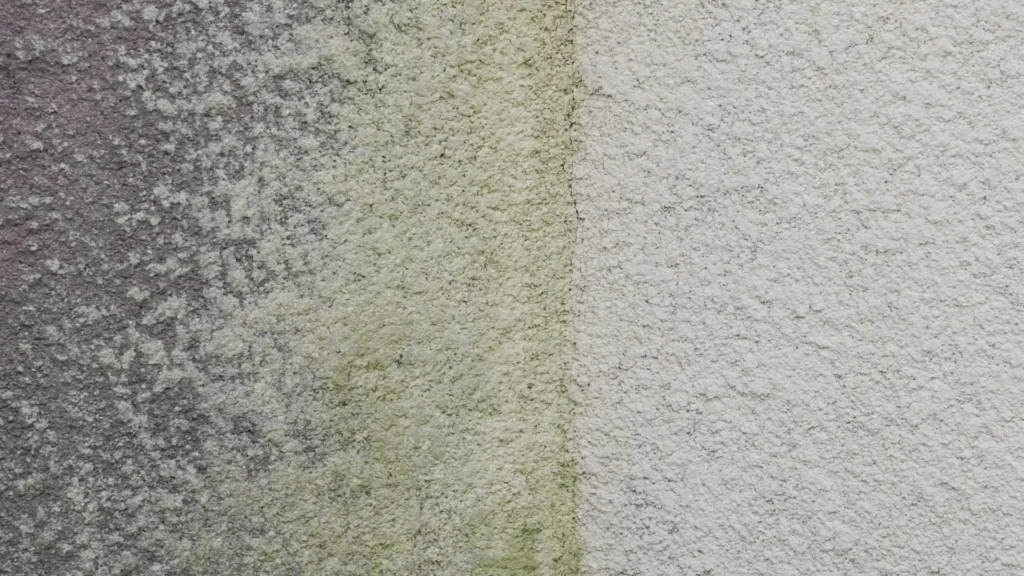
Rendered walls are not only aesthetically pleasing but also provide protection and insulation for your home. However, over time, they can accumulate dirt, grime, algae, and mould, making them appear dull and unattractive. Regularly cleaning your rendered walls is crucial to maintain their appearance and prolonging their lifespan. In this article, we will provide you with expert tips and tricks on how to effectively clean rendered walls, ensuring they look their best.
Table of content:
ToggleInspect the Walls
Before starting the cleaning process, inspect the rendered walls for any cracks, loose render, or signs of damage. If you notice any significant issues, it’s advisable to consult a professional to assess and repair the damage before proceeding with the cleaning.
Gather the Necessary Tools
To clean your rendered walls effectively, you’ll need the following tools:
- Soft-bristle brush or broom
- Garden hose with a spray nozzle or a pressure washer (if available)
- Mild detergent or specialized render cleaner
- Bucket
- Sponge or soft cloth
- Gloves
- Safety goggles (optional)
Prepare the Cleaning Solution
If you’re using a mild detergent, mix it with warm water in a bucket according to the manufacturer’s instructions. For specialised render cleaners, follow the product guidelines for dilution ratios. Avoid using harsh chemicals or abrasive cleaners as they can damage the render.
Preparing the area
Before you begin cleaning, protect surrounding areas such as plants, furniture, or windows with plastic sheeting or drop cloths. This will prevent any damage or staining caused by cleaning solutions or debris.

Remove loose debris
Using a soft-bristle brush or broom, gently remove loose dirt, dust, cobwebs, and any other debris from the rendered walls. Start from the top and work your way down, ensuring you cover the entire surface.
Pre-wet the walls
Using a garden hose with a spray nozzle or a pressure washer (on low pressure), pre-wet the rendered walls. This step helps to loosen and soften the dirt, making it easier to remove during the cleaning process. According to www.uk.weber.com, it is crucial to note that you need to adjust the pressure washer to a fan action rather than a jet action as this could damage the render.
Apply the cleaning solution
Dip a sponge or soft cloth into the prepared cleaning solution and apply it to a small section of the wall. Work in circular motions, applying gentle pressure to dislodge dirt and stains. Avoid scrubbing too vigorously, as it may damage the render. Continue this process, working in manageable sections.
Rinse the walls
Once you’ve cleaned a section of the wall, rinse it thoroughly using a garden hose or pressure washer (on low pressure). Ensure all cleaning solution residue is removed, as it can leave streaks or discolouration if left behind.
Stubborn Stains and Algae/Mould
For stubborn stains or areas affected by algae or mould growth, a specialized render cleaner may be required. Follow the product instructions carefully, applying the cleaner to the affected area and allowing it to sit for the recommended time before rinsing it off.
Finishing touches
After cleaning the entire rendered wall, inspect it for any missed spots or lingering stains. For tough stains, you may need to repeat the cleaning process or consider seeking professional assistance. Additionally, remember to clean any accessories or decorative elements on the wall, such as downpipes or light fixtures, if applicable.
Conclusion
Regularly cleaning your rendered walls not only enhances their appearance but also extends their lifespan. By following these expert tips and tricks, you can effectively clean your rendered walls, removing dirt, grime, and stains without damaging the render. Remember to always prioritise safety by using appropriate protective gear and avoiding the use of harsh chemicals. With proper care and maintenance, your rendered walls will remain beautiful and serve as a source of pride for your home.
Frequently asked questions
Question 1: How often should I clean my rendered walls?
Answer 1: The frequency of cleaning depends on various factors such as the location of your property, the local climate, and the level of exposure to dirt and pollution. Generally, it is recommended to clean your rendered walls at least once a year. However, if you live in an area with high levels of pollution, near the coast, or in a humid climate, you may need to clean them more frequently, perhaps every six months. Regular visual inspections will also help you determine if your walls need cleaning sooner.
Question 2: Can I use a pressure washer to clean rendered walls?
Answer 2: Yes, you can use a pressure washer to clean rendered walls, but it’s crucial to use it on low pressure to avoid damaging the render. High-pressure settings can strip away the render or force water into any existing cracks, causing further damage. Always keep the nozzle at a safe distance from the wall, and test the pressure on a small, inconspicuous area before proceeding.
Question 3: What if I have algae or mould growth on my rendered walls?
Answer 3: Algae and mould are common issues on rendered walls, especially in damp or shaded areas. To tackle this problem, consider using a specialized render cleaner formulated to remove algae and mould. Follow the instructions provided with the cleaner, which may involve applying it to the affected areas, letting it sit for a specific duration, and then rinsing it off. In severe cases, you may need to consult a professional for assistance.
Question 4: Can I use bleach to clean my rendered walls?
Answer 4: It is generally not recommended to use bleach on rendered walls. While bleach can effectively kill algae and mould, it can also damage the render and cause discolouration. Additionally, the runoff from bleach can harm surrounding plants and grass. It’s best to use mild detergents or specialized render cleaners that are safe for the render and the environment.
Question 5: How can I prevent algae and mould growth on my rendered walls?
Answer 5: To minimise the occurrence of algae and mould, ensure proper ventilation and sunlight exposure to the rendered walls. Trim any overhanging tree branches or shrubs that may obstruct sunlight. Regularly inspect your walls for any signs of moisture buildup or cracks, as these can contribute to the growth of algae and mould. Promptly address any leaks or sources of excess moisture near the walls.
Question 6: Can I paint my rendered walls after cleaning?
Answer 6: Yes, after cleaning your rendered walls, you can consider applying a fresh coat of paint to enhance their appearance and protection. However, it’s essential to allow the walls to dry completely before painting. Check the manufacturer’s recommendations for the appropriate drying time. Additionally, ensure the walls are clean and free from any residual cleaning solutions or contaminants that may affect paint adhesion.


